Implementing IPv6 Networks for Student Labs
June 20, 2024
I was recently assigned to teach a class that required the use of IPv6 networks for student labs. To provide real IPv6 networks, my initial plan was to create seven accounts with Hurricane Electric (HE), leveraging their free IPv6 tunneling service to obtain seven individual IPv6 networks, one for each lab. If you're unfamiliar with setting this up, you can refer to this guide: Global Unicast IPv6 addresses for your free home rXg powered LAN.
The Plan
After some consideration, I realized that HE routes a /64 network over the tunnel to the rXg. This setup allowed me to use that network block on the LAN side of the rXg. However, best practices suggest not breaking /64s into smaller networks. Therefore, I sought a larger network segment and discovered that HE allows you to request a /48 network.

Routing a /48 network to the rXg was ideal because it contains many /64 networks. For my needs, I planned to run seven labs, each with approximately 500 accounts, necessitating at least 500 subnets per rXg lab. Given IPv6's scalability, I divided the /48 into 32 manageable /53 segments. Each /53 segment can accommodate 2048 /64 networks, ensuring ample address space for my lab environment.
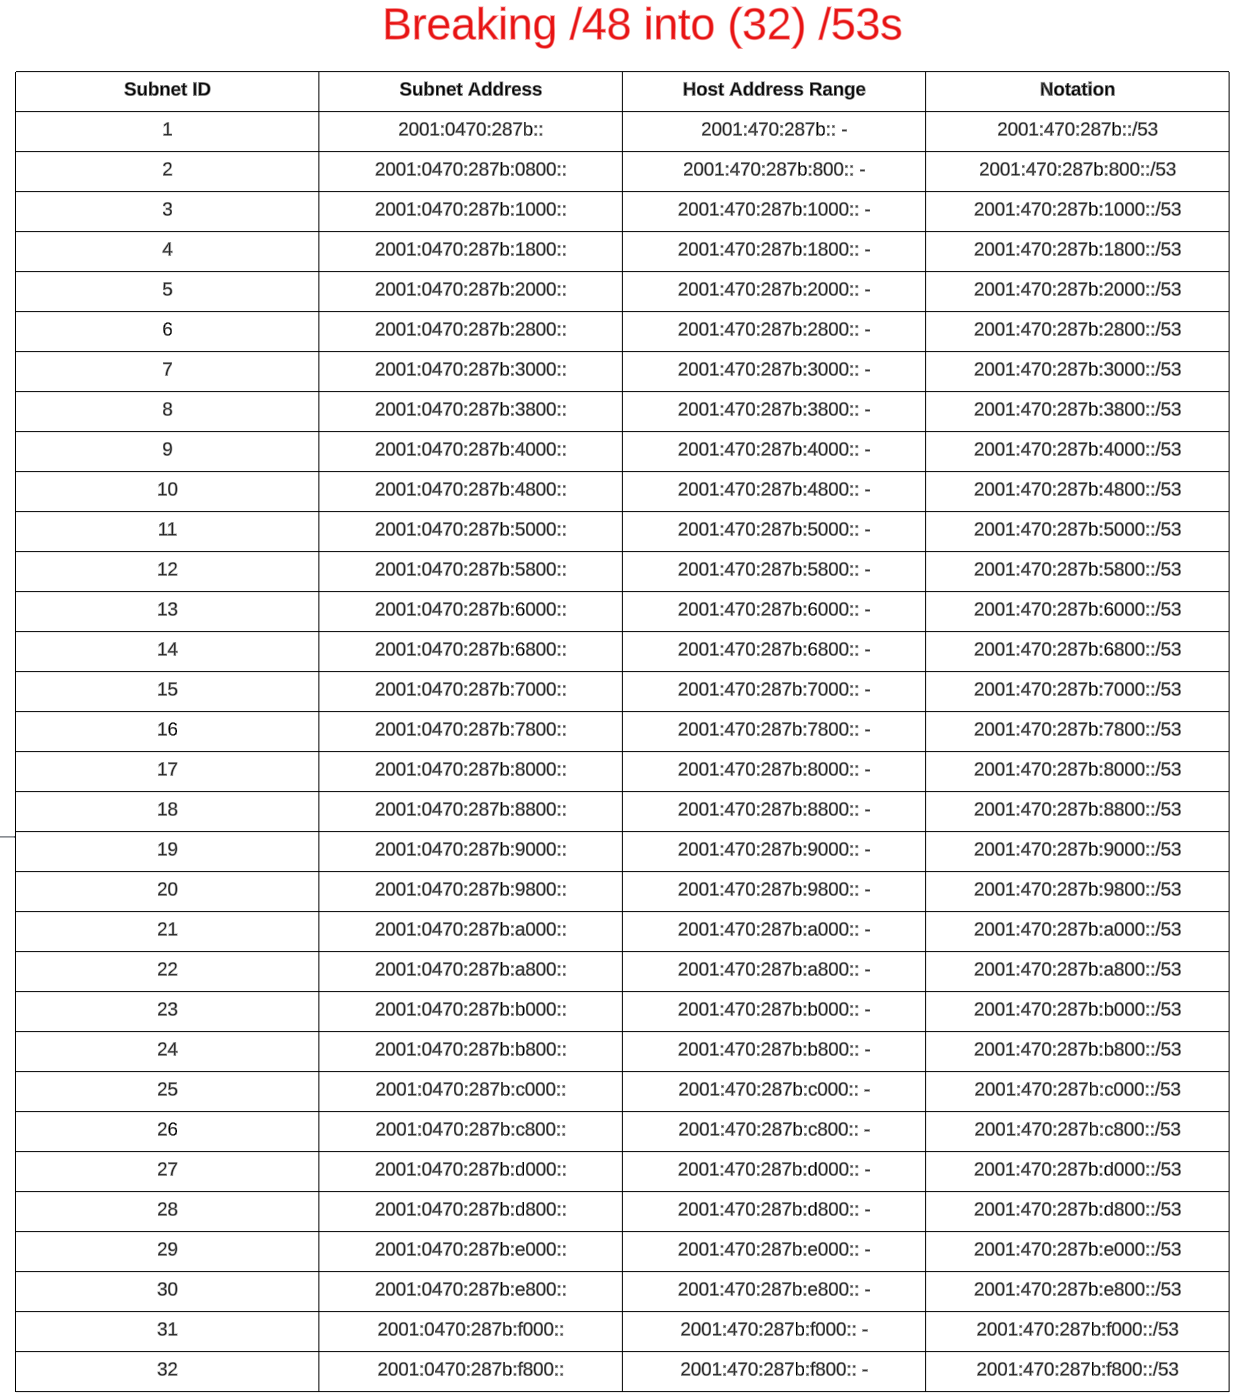
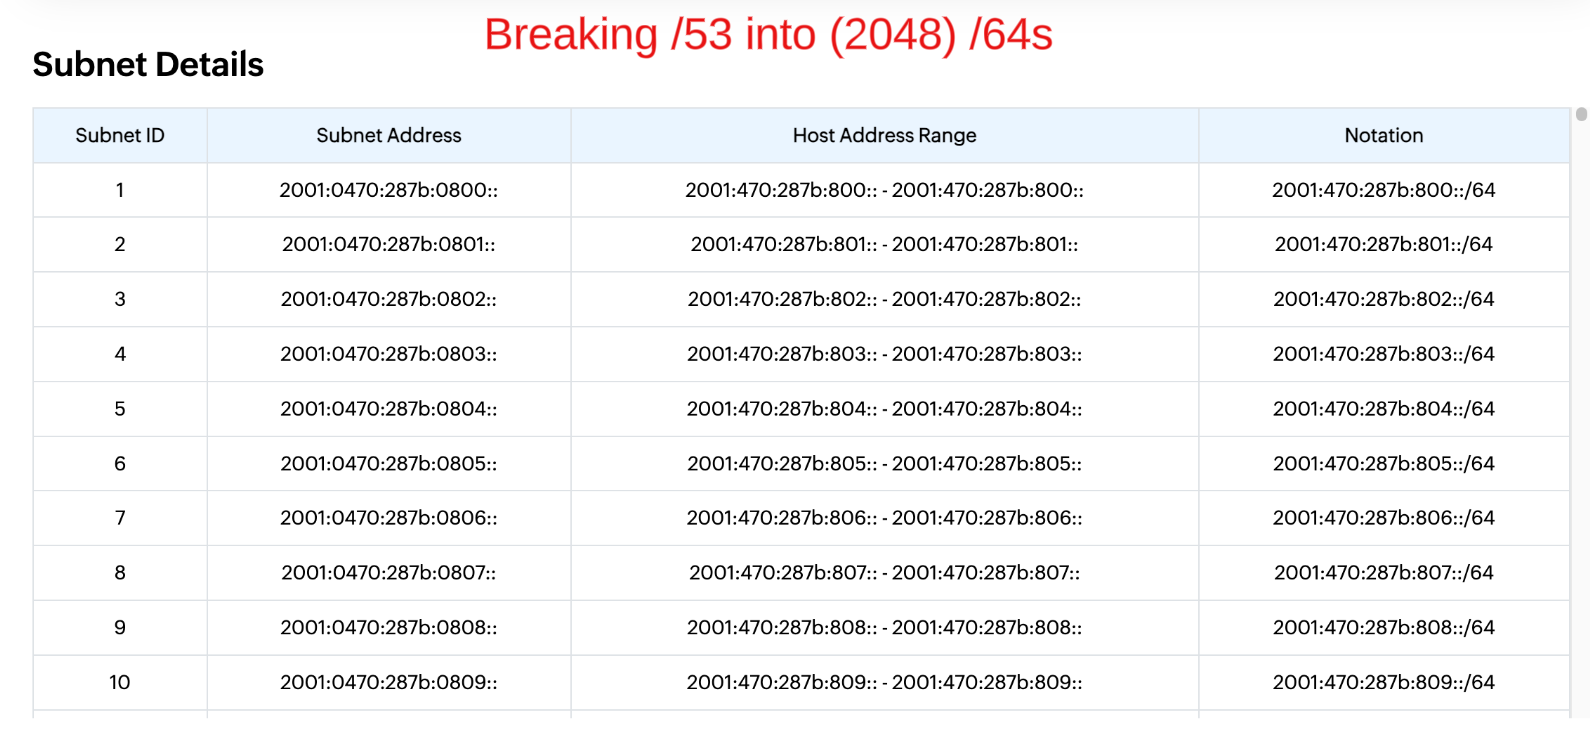
Now, each /53 can be broken down further into /64s.
Here is an overview of the topology:

Network Topology
Here’s an overview of the topology:
- Tunnel Creation: I established a tunnel with HE using IPv4 to create an IPv6 tunnel.
- Network Assignment: HE assigned and routed two networks to me. Since these addresses are not assigned to my WAN interface, they can be used on the LAN interface of the ipv6.rxg.ninja lab system.
- IPv6 Transport Network: I used the /64 on the LAN side of ipv6.rxg.ninja to connect with downstream rXgs, similar to the initial tunnel creation but without another tunnel. This network is referred to as the IPv6 transport network.
- Routing Configuration: I routed a small portion of the /48 to this lab system
I can now repeat steps 3 and 4 for up to 31 additional lab systems.
The Configuration
- On** ipv6.rxg.ninja**, I followed the KB article to establish a tunnel to HE and assigned the /64 block from HE to the LAN side of the system.


Although this setup was initially intended as a temporary solution for a single class, it proved so effective that I plan to maintain it as a permanent feature in my lab for ongoing IPv6 testing. As long as the ipv6.rxg.ninja system remains operational, I have a reliable IPv6 network infrastructure for future testing.


